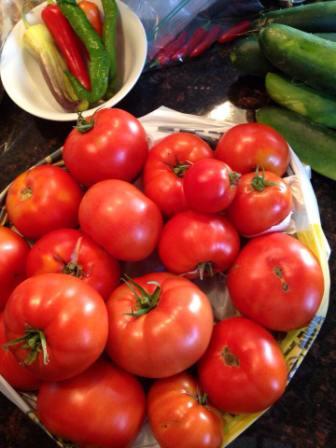
Ever considered planting tomato seeds? Perhaps you’ve grown tomatoes from transplants for a few years now, like we have, and are looking to get a little more experimental and hands-on with your NJ tomato crop.
As my NJ gardener pal, Laura, is likely to tell you, growing tomatoes from seed requires a bit of extra nurturing, coddling and coaxing than you may be used to giving your garden plants.
And yet, the reward of slicing up those fat, juicy beauties might just make this your best summer of tomato-growing yet!
So if you’ve got the time, why not try it out this spring? After all, you just never know when some extra homesteading knowledge might prove useful in your life.
To grow tomatoes from seed naturally involves buying some seeds. And if you’re serious about tomatoes, then you may already know that hybrid varieties such as those you’d typically find on the seed racks at Shoprite and Home Depot, are the lackluster option which will produce mediocre fruit at best.
No, a NJ tomato grower with a bit of gumption will want to seed-start this year’s crop with some fine specimens of heirloom tomatoes. There are certainly a good assortment of lovingly-cultivated and reverently passed-down heirloom seeds to choose from. Whether it’s Cherokee Purple, “Aunt Ginny’s Purple,” “Boxcar Willie,” Brandywine, or another type of prized, backyard-grown tomato, each one will have its own noteworthy characteristics, such as unique appearance and color, exceptional flavor, use in sauces versus salads, and other traits.
Knowing this, it’s worth taking the time to choose a few different tomato types to lend variety to this summer’s succulent crop that you lovingly plant from seed.
Steps for Starting Tomato Plants from Seed
Start your seeds approximately 6 to 8 weeks before the last spring frost. Here in NJ, you’re pretty much safe from frost after May 15. So, count back from that point to March 15 to March 30/April 1 to begin growing tomatoes indoors from seed.
Buy a bag of prepared seed growing mix, along with several large, shallow containers to fill. If you get confused while shopping, ask for assistance from the nursery workers who can probably guide you in the right direction.
Set up your seed-growing containers. Fill your seed containers about 3/4 of the way full, and moisten the soil a bit. Make very shallow rows with a pen or pencil about 1/4 inch deep. Then, drop the seeds into those furloughs roughly 1/2 inch apart. With your thumb and forefinger, tenderly pinch together the soil to cover each furlough, placing 1/4 inch of soil over each seed. Water very gently, and then place these containers in an area which will maintain approximately 75 to 80-degree (Fahrenheit) conditions.
Once the seeds begin to sprout, place them under fluorescent grow light bulbs. Alternatively, you can place them in a greenhouse-type setting where they can receive natural light from the sun– although most newish gardeners don’t have this option available to them. Keep your seed mix moist, and check each day to be sure your plants are getting just the right amount of water and light.
Transplant to larger containers. In about 30 days, tiny tomato leaves will begin to appear. The time has come to transplant, or “prick out” your seedlings to bigger containers. Gently scoop out each individual tomato seedling, taking care not to disturb the roots, and transplant each little plant into its own container filled with moistened potting mix. Water gently.
Harden off your young tomato plants. After the weather warms up to 55-degree temperatures at nights, move your young tomato plants out into the sun for a few hours each day, increasing the amount gradually. This is known as “hardening off,” and it’s necessary to get your tender plants used to the cooler air and variable weather before moving permanently to the garden beds outside.
Transplant to the garden beds outside. Before transplanting your seedlings to the garden beds, be sure to check the pH level of your soil. You can use a home soil testing kit for this purpose. Your tomatoes will prefer a pH of between 6.0 to 6.8.
Before planting in the garden, remove the bottom branches of your tomato plants. Bury 3/4 of the way into the soil to ensure a strong root system.
Stake or cage your plants. Add tomato support in the form of cages or stakes which you can tie to the plants using twine, and water gently. As your tomato plants grow, simply water as needed. Depending on the variety of tomato plants you’re growing, you’ll start to see tomatoes ripening on the vine as summer is well underway. If you get tomatoes by 4th of July, you’re in excellent shape… though many heirloom varieties can take longer before they’re ready to eat.
Don’t forget to take lots of pictures of your beautiful, heirloom tomatoes, and share them with us on Facebook!
Order our NJ Zone 6 Organic Gardening E-Guide and Encyclopedia of Veggies, Herbs and Companion Flowers
Gardening is easy… and it’s also complicated. To become a pro, why not check out our Complete Beginner’s E-Guide to Organic Gardening in NJ Zone 6. Now available in ebook format only, available for instant download via PayPal payment.
