How to Harvest and Prepare Beets So People Actually Eat and Enjoy Them
“Eww… beets!?” Remember saying that as a kid? There was nothing worse than beets for dinner, unless it was beets and liver (yes, my mom actually served this to us once… thank God for ketchup!).
Now that we’re all grown up and searching for ways to look better and live longer, beets are back in vogue. But did we ever actually start to enjoy the taste? Here are my organic gardener’s instructions for how to turn your June beet crop into eaty, beety goodness.
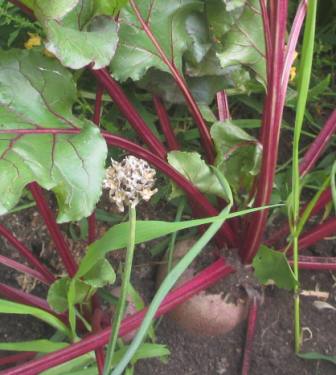
Step 1: Pick the beets. You’ll know when they’re ready because the roots will bulge out of the soil where they’re growing. Grab your beet plant at the base of the stem, and gently twist out of the ground. Or, use a small garden fork to loosen the soil around the roots before pulling up your garden beets.
Step 2: Rinse the beets. Beets are notorious for being one of the dirtiest (but healthiest!) characters in the garden. Stop by the garden hose on your way back into the house. Or, if you dare, carefully transport your newly picked beets straight to the kitchen sink. Grab a large, stainless steel bowl, and the sprayer hose, and try not to splash the countertop or get dirt on the backsplash as you rinse them.
Step 3: Continue cleaning the beets. Rinse them thoroughly, until most of the soil has washed away into the drain catcher. You can scrub too if you like, but since we’ll be boiling them and peeling off the outer layer, there’s really no need to get too crazy. Next, use kitchen shears to snip the stems away from the roots. DO NOT THROW THE LEAVES AND STEMS AWAY! We’ll be using them in a tasty recipe.
Step 4: Keep on cleaning those beets! You think I’m joking, but actually beets are pretty dirty. Dunk the beet roots into the bowl which you should have filled with water by now. Swish them around, then lay them on a non-lint-producing towel to dry.
Step 5: Cook the beet roots. Fill a pot (should be big enough to hold however many beets you have, plus enough water to cover the beets), with water and place on the burner, set to medium-high or high. When the water boils, lower heat to a simmer and let the beets cook for at least a half hour to an hour, depending on the size and number of beets. Test every so often by pushing a fork into the still-cooking beets. If you’re able to insert the fork without any resistance, the beets are done.
Step 6: Cool the cooked beets. Remove from the pot of hot water and transfer cooked beets to a bowl in the sink where you can run cold water on them to hasten the cooling process. This may take quite a while. Go about your other business to pass the time. (Actually, now would be a good time to sautee up the beet greens.) Once the beets are cool, you should be able to peel away the tough, outer skin.
Step 7: Chop up the beet greens. If you haven’t done anything with them yet, then they should be plenty dry by now. Place on a cutting board. Bundle the stems together. Set aside.
Step 8: Cook the beet greens. I like to mince up several cloves of garlic and then sautee it up with some nice olive oil, before tossing my chopped stems into the hot oil and mixing around with the garlic while they cook together. Let the stems cook for a few minutes, stirring occasionally, before piling up the greens on top and covering with a lid. The greens will shrink down pretty quickly as they cook.
Once the greens are in the pan, lower the heat to about medium or medium-low, and continue to turn with a fork, for about 10 minutes. Test doneness by sampling some of the stems; they should be al dente, not mushy. When done to your liking, remove from heat. I like to chop up the greens with my handy shears, but you can leave them whole if you like. Let cool, and add a few squeezes of lemon and maybe a sprinkle of salt.
Step 9: Make the beet roots into a tasty salad. Chop up some fresh onion. Slice the beets into whatever size you like, then mix in the onions. Pour oil and vinegar over the mixture. Season with salt and pepper and stir everything together. Marinate your beet salad in the fridge to improve the flavor. Your beet salad will keep for up to 2 weeks!
Step 10: Eat the beets! Serve the beet salad, or the sauteed beet greens, or both, as a side at your next lunch or dinner meal. The cooked greens will taste great either warm or chilled. Yum, yum… nothing beats the delicious flavor of beets, glorious beets!